Posts

How to get llama 2 up and running , in a VM, with no GPU, and limited memory on Ubuntu

Image
OK I decided to write this up after unsuccessfully being able to find all the required info I needed in one place. In this setup we will be using Ubuntu Server 22.04.2 LTS as the OS. I have this running on a home lab ESXi server 8, on a HP Compaq Pro 6300 SFF CPU = Intel Core i7-3770 Installed Memory 16 GB I have some 10K SAS drives installed for the VM's If you have not already, navigate to  Get Ubuntu Server | Download | Ubuntu and download the 22.04.2 LTS ISO Next Lets create our VM that we are going to run this in. *Note Im using ESXi however you can probably do this in Workstation, Fusion, VirtualBox etc The main things to note on the VM creation. Set Ubuntu 64 bit as the guest OS Set your CPU relevant to the physicals CPU, I will be starting with 4 VCPU Set your Memory to as much as you can tolerate, I will be using 12 Disk Space - we are creating a 100G swap file, and the rest of the file can take up some room , so more is better if you can afford it Dont forget to add the U

Sleep Progress Bar for Powershell \ Power-CLI scripts function

Image
I used this to update my lab power shell scripts so that during the sleep cycle , I have some indication of where we are at. You can read about these scrpits here https://jeramythompson.blogspot.com/2021/08/powercli-script-creating-instant-clone.html https://jeramythompson.blogspot.com/2021/08/vmware-vsphere-vcenter-and-esxi-home.html The End result will look like this This is achivied by creating a simple function at the top of the script and calling it later: ----------Here is the Function ------------------- function Get-SleepTimer{ param ( [int]$Time ) $Lenght = $Time / 100 For ($Time; $Time -gt 0; $Time--) { $min = [int](([string]($Time/60)).split('.')[0]) $text = " " + $min + " minutes " + ($Time % 60) + " seconds left" Write-Progress -Activity "Watiting for..." -Status $Text -PercentComplete ($Time / $Lenght) Start-Sleep 1 } } -----------------End Function--------- And we can simply call this function and pass the number of s

VMware vSphere vCenter and ESXi Home Lab shutdown script with PowerCLI

Some times you need to shut down your lab in as efficient way as possible. I do this quite often as I don't like leaving my home lab running during various events (thunderstorms, weekends , vacation etc). And I really dont like having to click , wait, click, wait, click.... wait some more to get every thing down. So I wrote this script to power down my lab, Ill walk you through what it does and the completed version will be at the end of this post. (I'm also including a start-up script I use as well) First we need to import our power CLI modules and tell the script to ignore any self-signed or Invalid certificates ( If you want more info on setting up powerCli see the beginning of this post for more info) ------------------------------------------------------------------- Import-Module VMware.PowerCLI Set-PowerCLIConfiguration -InvalidCertificateAction Ignore -Confirm:$false ------------------------------------------------------------------- Now we need to setup our credential

PowerCLI Script creating Instant Clone Pools in Horizon 8 Walk through

Image
 One task I run into quite often is deploying Instant Clone pools to test one thing or another. I dont always leave my lab running, so all the pools get deleted , and then recreated when needed. If you have ever created an instant you know you have to click about 20 settings, while not a monumental task, it is a bit reparative. So we are going to go through the process of creating our own script , so we only need to click once to deploy our instant clone pool. You are going to need a couple of things: Internet access PowerCLI installed PowerCLI Example Scripts (Optional) A dedicated workstation to store your password on. Ok lets start with installing PowerCLI. Open power shell as an administrator And run the following command to install PowerCLI Install-Module VMware.PowerCLI Type A and hit Enter Wait for the progress bar to complete  the install of the modules Once Complete run the following to verify it was installed and get the Version number if you need it at some point Get-Module

Formatting Annotations.WelcomeMessage for the ESXi host so its not one long line 7.0

Image
Lets say your company needs a security banner on your ESXi host, but  you need your text to go to the next line like the examples below: Edit the settings, and place a /n (linux escape char) in the line you want to start new: Now you have your text on a new line

vSphere 7 - Specify a vmkernel adapter to use for NFS datastores Step By Step \ Walkthrough on a DVS

Image
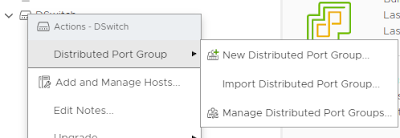
 Recently I needed to setup a NFS server but needed it to specifically be on a specific vmkernel adapter. I found this KB https://kb.vmware.com/s/article/50112854 however there were some things missing so I decided to write this walkthrough incase it helps any one else. First thing , remove all NFS mounted datastores if you haven't already. I ran through this on 7.0.2 however is probably the same for other versions. Step 1: This is going to be on a DVS, so we want to go ahead and create a port group to silo off our NFS traffic. To make life easy, we will just call it NFS Static binding and elastic port allocation were the defaults so I let these there. If you are VLAN'ing your traffic modify this info here, and complete the wizard. Next put your host into Maintenance Mode We are going to add a New TCP/IP stack to the host. First check that you have not already created one in the UI by opening a browser to the ESXi host, navigate to networking > TCP/IP Stacks SSH into your ES

Windows 11 Insider Preview Instant Clones Horizon 8 2103 walkthrough - Part 2 Pool Setup and Deploy

Image
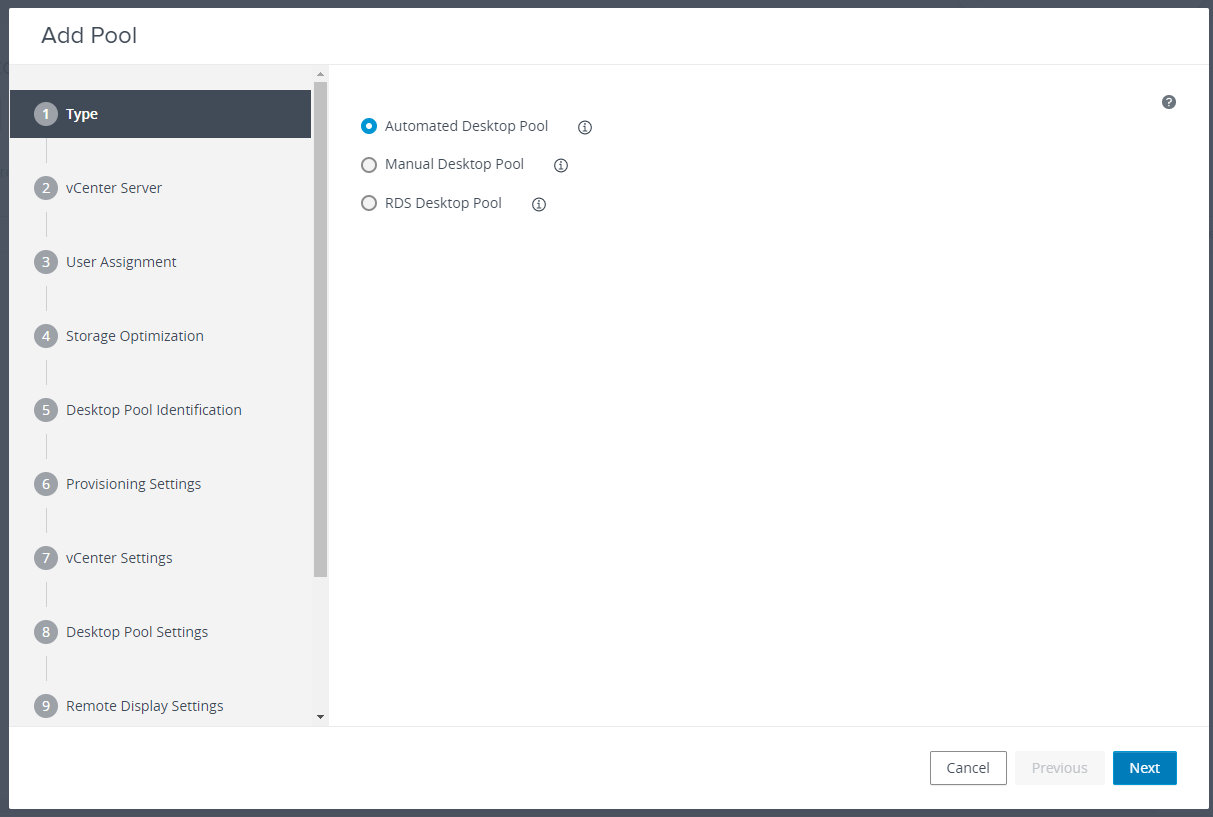
 In this section we will deploy an Instant Clone Poo on Horizon 2103 with the Windows 11 Insider Preview. If you missed it , In this post we showed how to get the Preview, and how to setup the image here. Log into your Horizon Admin, select Desktops and click on Add. Walk through the Wizzard: Lets Get connected Ok here are some quick inital performance shots: Blast: PcoIP: Printer Redirection working : Client Drive redirection working as well