Creating the Master Template is a fairly straight forward process and will walk through them here.
In vCenter, create a new Virtual Machine

Give the Virtual Machine a unique name that is easily identifiable

Select the correct Guest OS and Version

Configure the Virtual Machine with the following Settings:
- CPU - 1 or 2 is usually sufficient
- Memory - I would recommend 2GB or more since it utilizes a graphical interface
- Hard Disk - 16GB is enough for a testing deployment, however you may want to increase this based on you needs. Keep in mind these are disposable so dont go too crazy with the size of this.
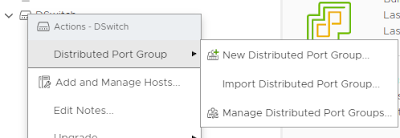
- Network - This should already be configured for VMXNET3 adapter, but double check. This should be attached to a network that has 'static port bindings' with elastic port allocation'
- CD/DVD - You can point the VM to the ISO here, or do it after creation
- Video Card - In the 7.9 documentation there is a chart on changing these , however in 7.11 it statues to only change vCPU and memory I went ahead and just changes this anyway just incase

Finish creating your VM.
Boot your VM and open a console to it, select "Install Red Hat Enterprise Linux 8.0.0

Select the Language

Select the options you would like to install, make sure you select 'Workstation' as the Base Environment:

:
Configure the network:
- Set the FQDN of the computer
- Enable the network adapter
- Disable IPv6 (unless you use it in your environment)


During the install you will be prompted to create a root password and a new user account.

Once the install completes reboot the VM

A quick note*
When the VM is in the process of rebooting, go ahead and remove the ISO from the VM so you dont have to do this later.

Once the VM has booted you should have your login screen similar to this:

At this point you have 2 options:
- Login and use the terminal to run the commands or
- SSH into the VM and and run the commands
In my case I wanted to get everything done from the shell, so i checked vCenter to get the IP and then opened an SSH session:
Once you have a shell session up either by longing in though the console or SSH, make your self root:
#sudo su
We will be be installing several packages from the Red Hat repository, this requires an active subscription (im using the free RHEL Dev subscription,
you can get more info here.)
Once it is registered, I would recommend shunting down the VM and taking a snapshot.
This gives us a good point to roll back to in case something goes south.
Now that we have created the Master Template , we can move on to the next step:


Comments
Post a Comment